Monday, September 10, 2012

Thrift Store Dresser Redone


Can there be too many blog postings about redoing furniture?  Nope, I don’t think so. 

This past weekend we were driving down Pacific Coast Highway on our way to check out a dresser set that we spotted on Craig’s List.  I’m not going to turn this in to a rant, because it all worked out for the best, but the set ended up selling before our appointment to view (we were the first callers).  So we turned around and drove to my favorite Salvation Army store in Huntington Beach.  As usual, our luck at this particular store was good!  We found a Mid Century dresser and nightstand set by Bassett Furniture with great lines and in good sturdy condition that we could re-do. 

Ingredients:
  • Hand Sander - Optional but makes the job easier!
  • Smooth Surface Sponge Roller
  • Small Sponge Paint Brush
  • Cheese Cloth
  • Rough Sand Paper / Fine Sand Paper
  • Cheese Cloth
  • Kilz Oil Base White Primer
  • Indoor paint - eggshell finish
  • Glaze or Craft Paint for aging / distressing
  • Minwax Finishing Paste


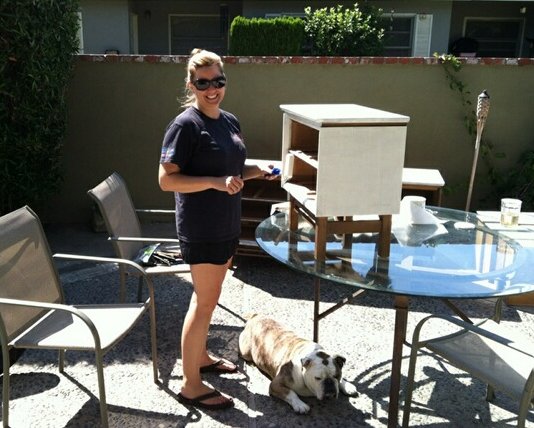
 Wipe down and lightly sand using a hand sander

My helper Winston!

Apply one coat of Kilz Oil Base Primer in White - Just a little warning....it was a warm day when I applied the primer and it did start to get thick and goupy by the time I was finishing up.  Let the primer dry overnight, sand lightly with a fine grit sand paper and wipe down with cheese cloth before painting.


I used an indoor paint in an eggshell enamel finish (Ace Hardware Brand) in the color of your choice - One Qt was plenty for this project.  
Using rough sand paper sand edges and random areas to distress


Water down glaze or brown craft paint and apply using cheese cloth or sponge paint brush.  Wipe off until you have just the amount of aging and distress wanted.


To finish apply a coat or two of Minwax Finishing Paste using cheese cloth  


We are very happy with the results!!  If you have any questions or you are interested in purchasing custom jobs please feel free to email me!  VandyCakes@gmail.com

Happy Junking!!
xxoo

Kristina
My Etsy Shop - VandyCakes

Friday, September 7, 2012

Vintage Paint by Numbers

Grouping of Dog PBN

The Paint by Number kit was introduced in the 1950’s allowing people that had never picked up a paint brush to complete a work of art (http://americanhistory.si.edu/paint/rembrandt.html). 
Some considered it another avenue of mindless conformity, but I am thankful that people took an interest. 

I love vintage Paint by Numbers and the kooky frames we find them in.  Every visit to the Long Beach Flea Market my eyes are scanning the booths in hopes of finding more.  I’ve found and purchased a few outdoors / mountain scenes, and of course passed up a gazillion cuddly kitten paintings, and creepy clowns, but my favorites are the tropical and beach scene Paint by Numbers, which continue to elude me while junk hunting.

I aspire to have a beautiful collection of tropical PBN and group them like Retro Renovations has done above.

The number of Tropical PBN's are limited on Etsy; below are few beauties that I found including links below.


1.  Paint by Numbers Vintage Hawaiian Island Scene by RRGS

2.  Vintage 1950s Gauguin inspired Polynesian Paint by Number by PinkysOfSaratoga

3.  Paint by Numbers Parrots by PrancingGoat

4.  Boat Beached for Repairs Paint by Number by MysticLily

5. Tropical Scene Paint by Numbers by StudioLicious


Tuesday, September 4, 2012

Painted Canvas Headboard - Union Jack Flag


We recently saw a project on Pinterest that used a fabric covered canvas as a headboard.  I’ve been trying my hardest to not just pin what I love on my Pinterest boards, but to actually make some of the projects.  The perfect opportunity came up with Ani’s 17th Birthday this passed weekend.  She is “the number ONE fan” of One Direction, a cute boy band out of the UK.  Ani will be decking out her dorm at UCLA with all things One Direction & the Union Jack flag. 

We used an extra heavy Canvas since this is going to be used as a headboard & taped it off using painters tape.  Note, the wide lines of the criss-cross tape are opposites...I almost messed this part up.


Of course our English Bulldog Winston oversaw the whole project! 


Here it is almost done.  I did some additional distressing and painted the white lines of the Union Jack with a pearlized white. 


Happy Junking!
xxoo
Kristina